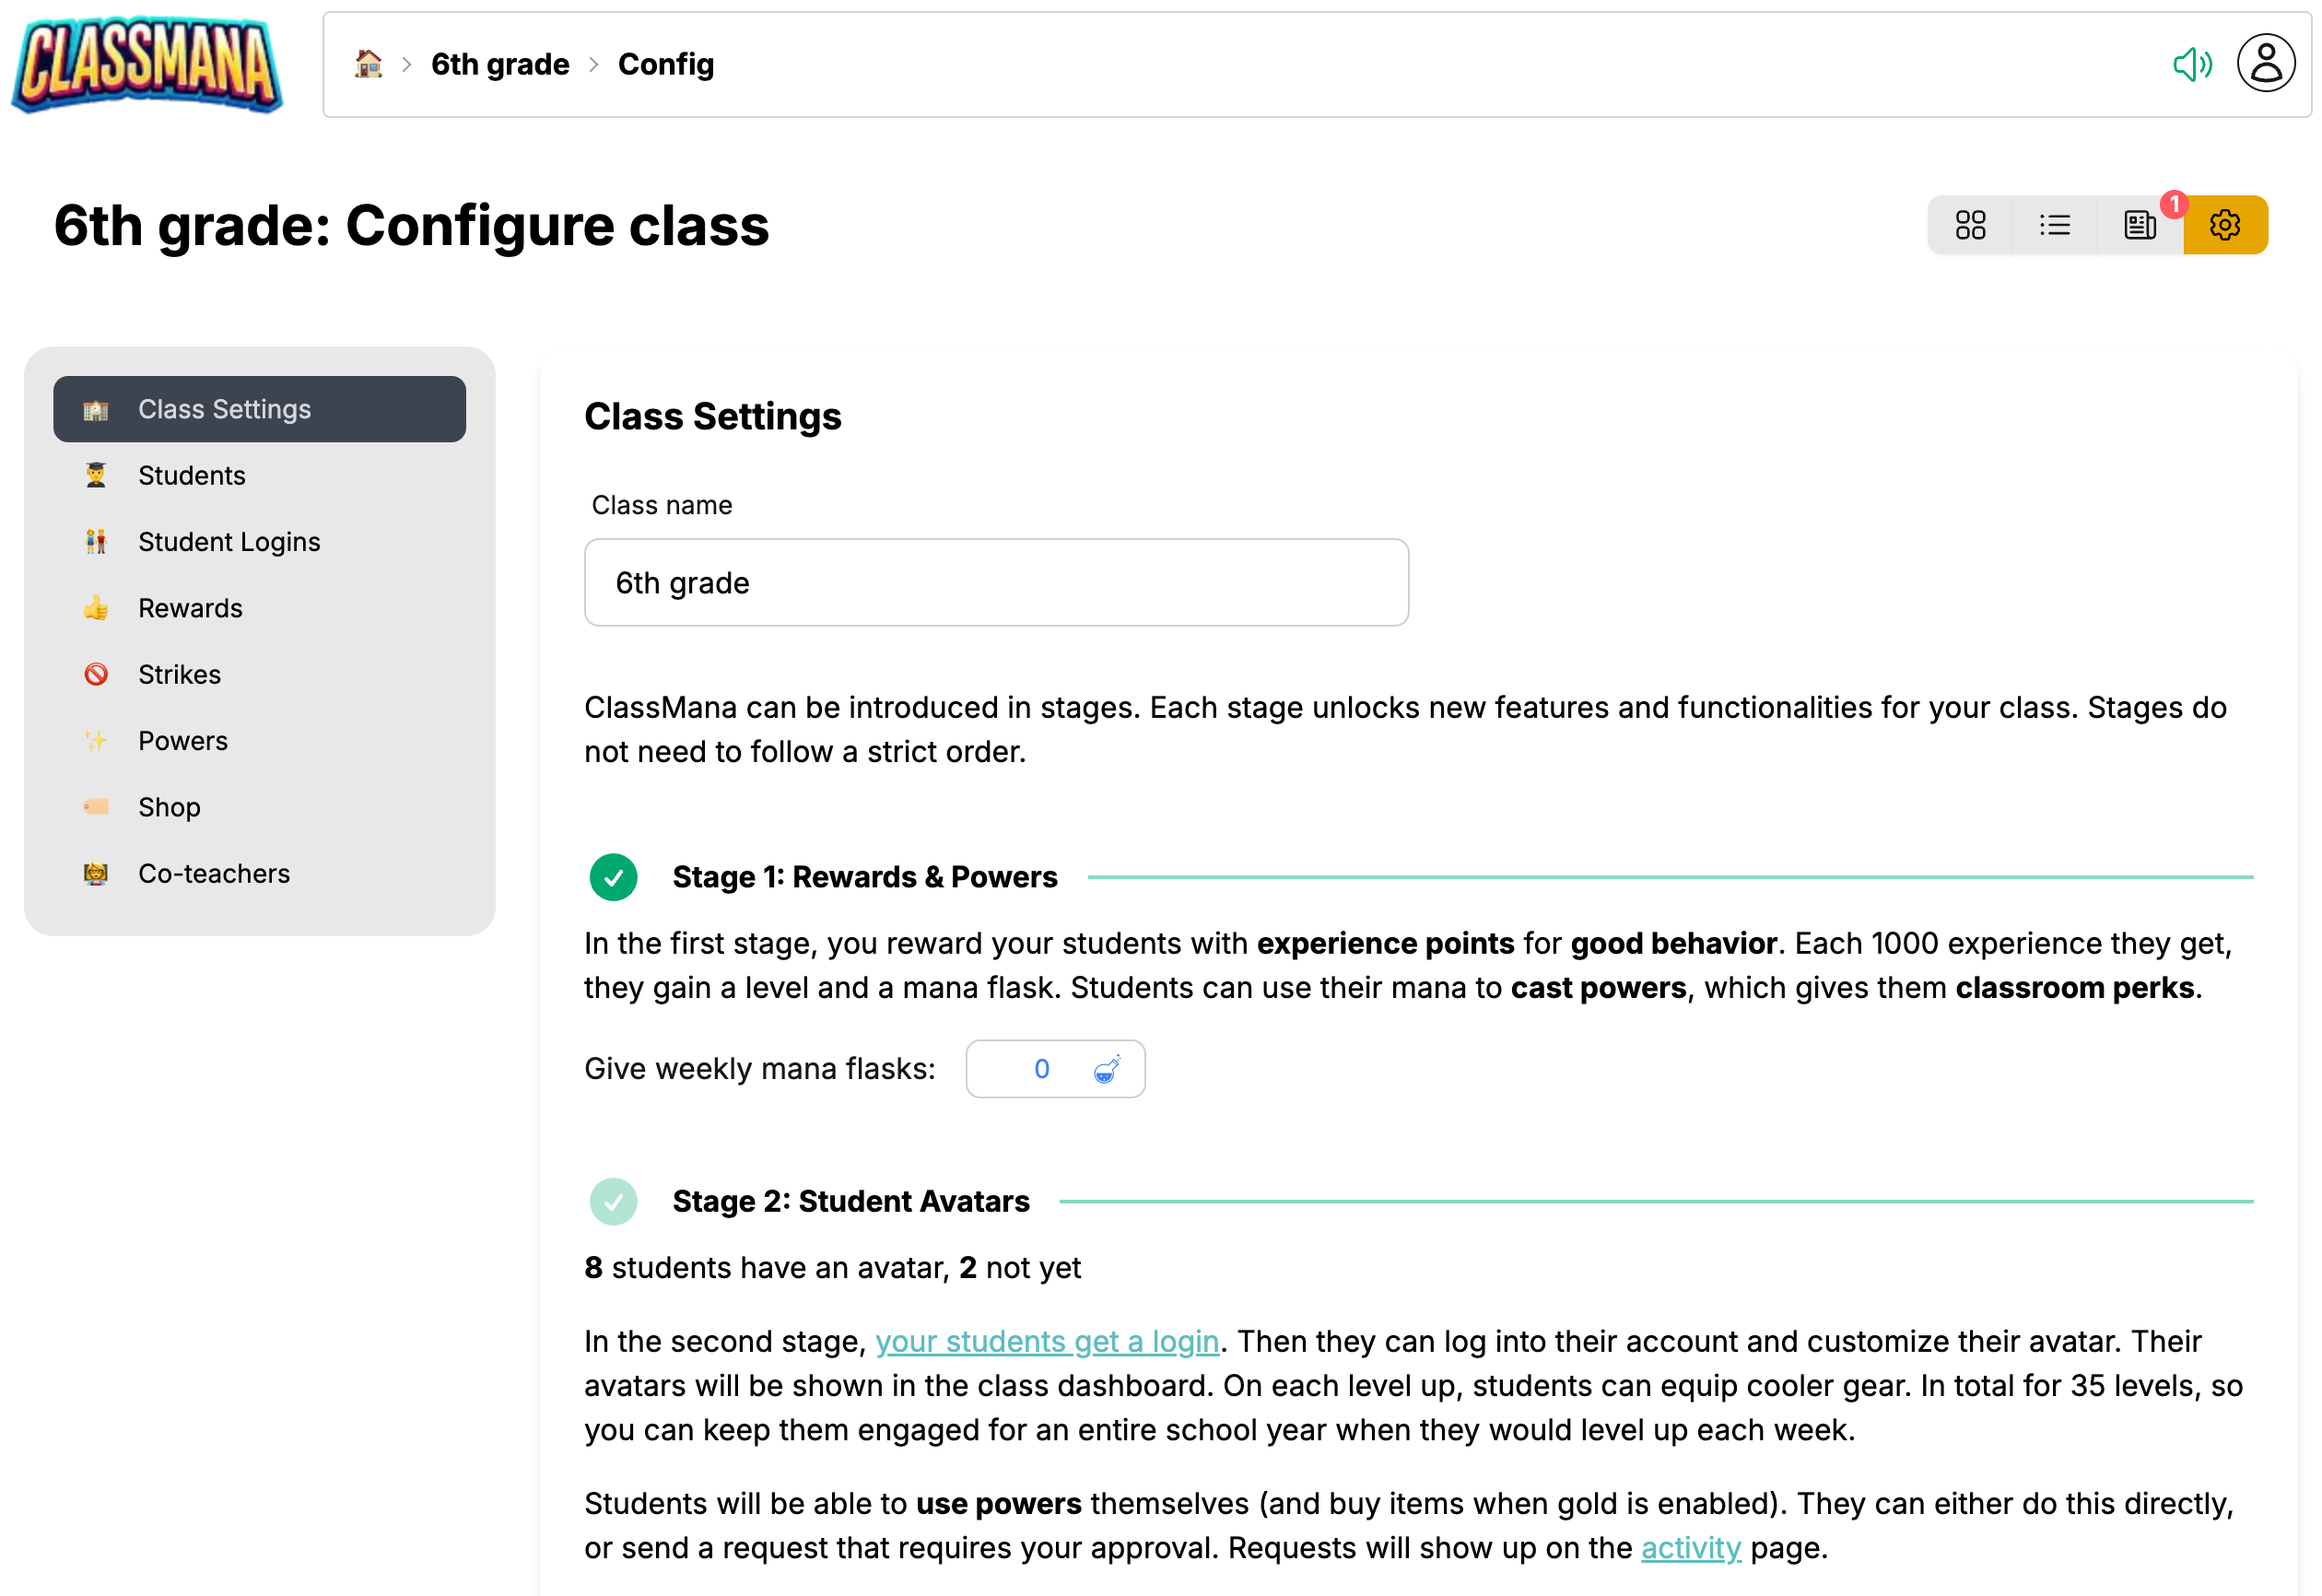
Stage 2: Student Avatars
In the second stage, your students get a login. Then they can log into their account and customize their avatar. Their avatars will be shown in the class dashboard. On each level up, students can equip cooler gear. In total for 35 levels, so you can keep them engaged for an entire school year when they would level up each week.
Students can also use powers themselves (and buy items when gold is enabled). They can either do this directly, or send requests that require your approval.
Quick Start Guide
There's no "enable" switch for Stage 2. It automatically activates once students configure their avatars.
Track Progress
In Class Settings, you'll see the status of Stage 2:
- "No students have avatars yet"
- "X students have an avatar, Y not yet"
- "All students have avatars"
1. Get Student Login Codes
Each student has a unique login code:
- Go to Class Settings (gear icon)
- Click "Student Logins" in the left menu
- You'll see each student's Name and Login Code
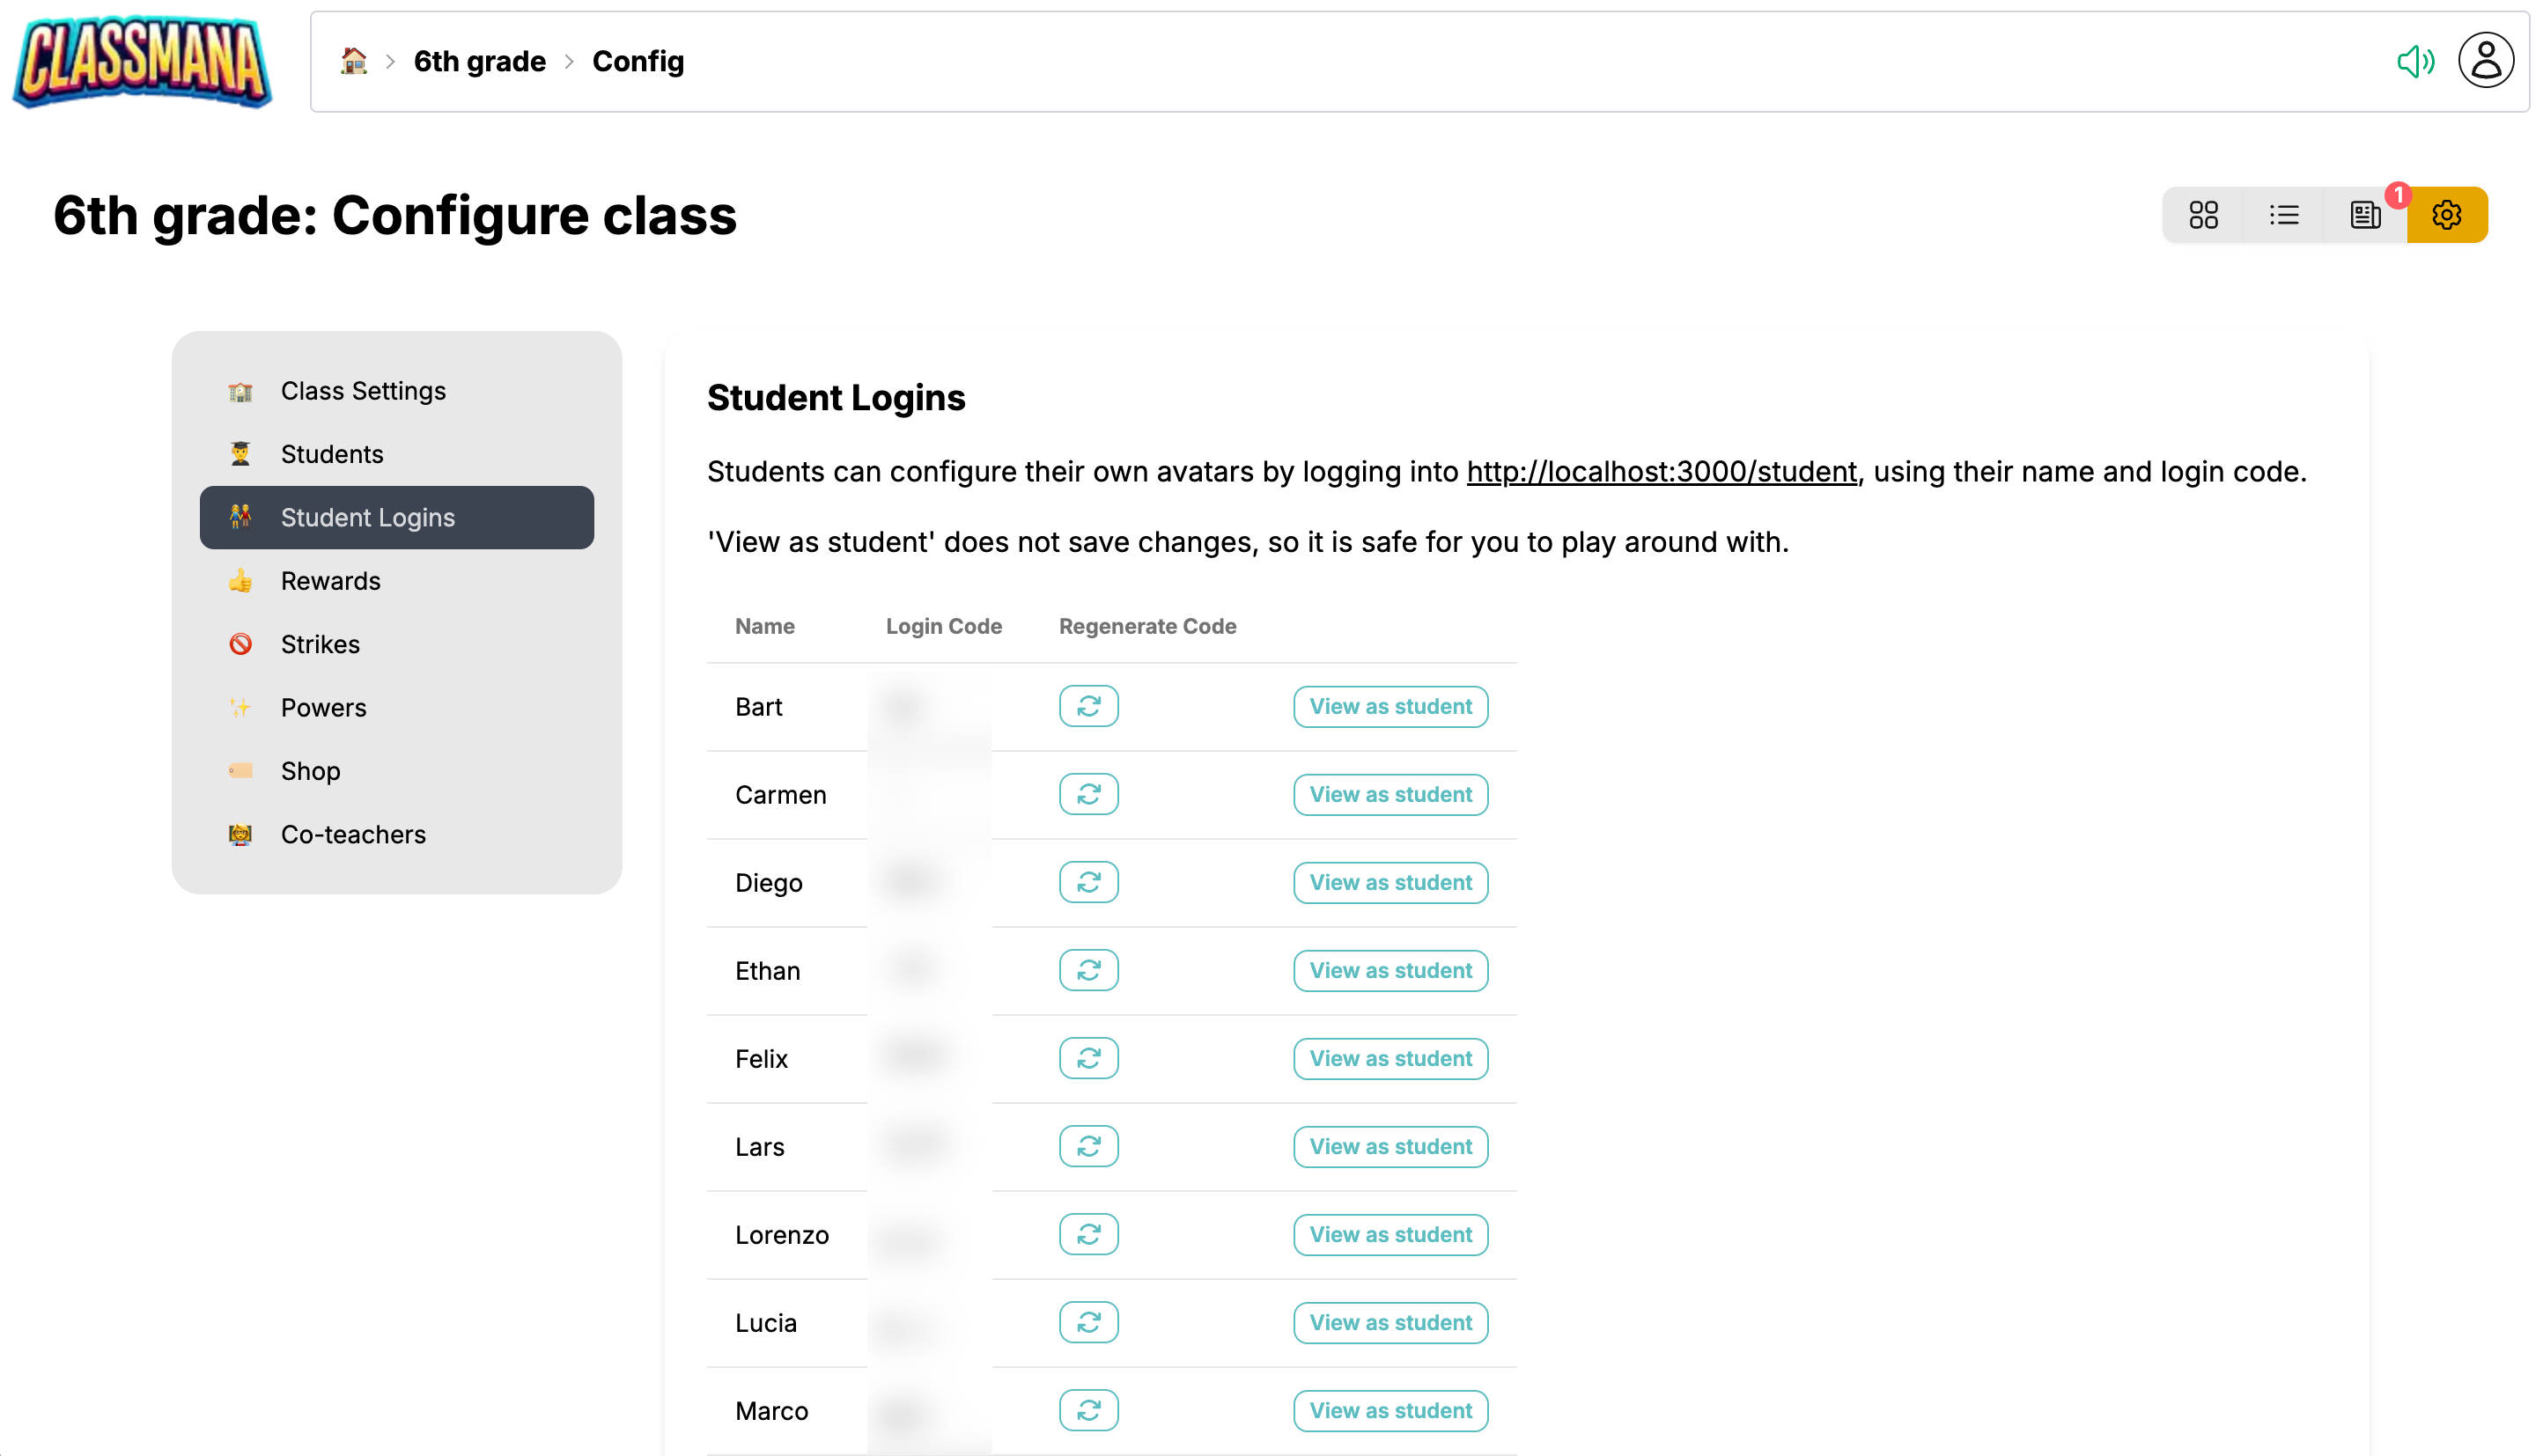
Preview the Student Experience
Use the "View as Student" button next to any login code to see exactly what that student sees. This helps you understand the interface and practice helping students. Changes made in preview mode are not saved.
2. Distribute Codes to Students
Share codes with your students along with their name:
- Print individual cards for each student
- Send codes through your school's messaging system
- Write codes in planners/agendas
Students will use their name and login code to access their account at the student login page.
Codes are case-insensitive, so students don't need to worry about capitalization. You can regenerate a code anytime if a student loses theirs.
Student Privacy
ClassMana takes student privacy seriously:
- No email addresses required
- No passwords to remember
- No personal information collected
- Students log in with simple codes
- Parents don't need to create accounts
3. Let Students Create Avatars
When students log in for the first time:
- They'll be prompted to "Configure your Avatar!"
- They customize their appearance (gender, skin tone, hair, facial features)
- After saving, Stage 2 is automatically activated for that student
![]()
Class Time for Setup
Allow 10-15 minutes of class time for initial avatar setup. Students get excited about customization, and it's easier to help everyone at once.
Avatar & Gear System
The progression system has 35 levels, designed for a full school year:
| Level Range | Unlocks |
|---|---|
| 1-10 | Basic clothing, simple accessories, hair styles |
| 11-25 | Cooler outfits, pets and companions, weapons and shields |
| 26-35 | Epic gear, rare items, wings, exclusive customizations |
How gear works:
- Gear unlocks automatically at certain levels
- Students don't purchase gear with mana or gold
- Once unlocked, gear can be equipped anytime
- Students can mix and match unlocked items
Progression pace: If students level up once per week, they'll reach level 35 by the end of a ~35-week school year.
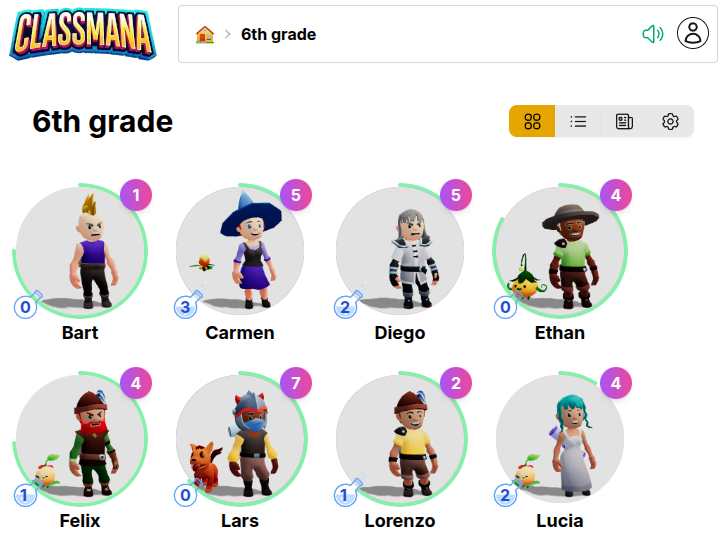
4. The Class Dashboard
The class dashboard displays all student avatars in a 3D grid:
- Students can see their classmates' characters
- Click any avatar to view that student's profile
- Creates a visual representation of the class community
Privacy Settings
Show Classmates to Students
By default, students can only see their own avatar when logged in. You can enable visibility of classmates if desired.
In Class Settings → Stage 2: Student Accounts, you'll find the "Show Classmates to Students" toggle:
- 🔲 Off (default) - Students only see their own avatar; the Classmates button is hidden
- ✅ On - Students see a "Classmates" button that opens a section showing other students' avatars and basic stats
When to Use This Setting
Keep this setting off if: - Parents might view the student screen and you don't want them seeing other children's information - Your school has strict privacy policies about displaying student data Turn it on if: - You want students to see and celebrate their classmates' progress - Building class community through avatar visibility is a goal
Student Self-Service
Student Powers & Buy Items
When students log in, they can use powers and buy shop items directly from their avatar dashboard. You decide whether they can use items instantly or need to request your approval first.
Their student dashboard shows Powers and Shop buttons (if gold is enabled):
Students can:
- Use powers with their earned mana (instant or request approval)
- Buy shop items with gold (if gold is enabled, instant or request approval)
- Track and cancel pending requests while waiting for your approval
Smart Resource Management
When students submit a request, their mana or gold is reserved so they can't overspend while waiting for your approval.
Managing Student Requests
When students submit requests, you'll see them immediately in your Activity page:
- The Activity button shows a badge counter (e.g., "3" or "9+") so you always know how many requests are waiting
- A pending requests section appears at the top with all requests awaiting your response
- One-click approve or reject each request
- The system validates that students have enough mana/gold before letting you approve
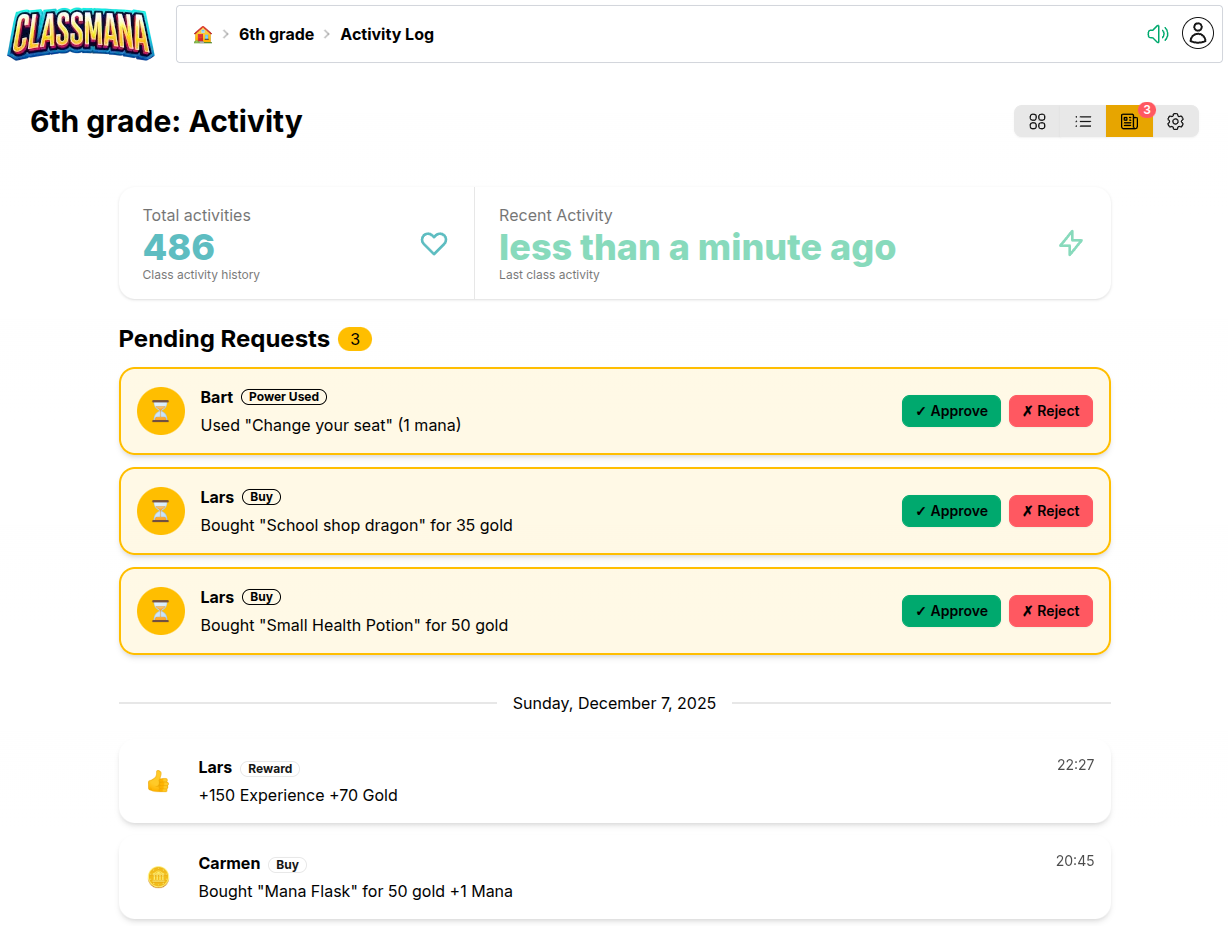
All requests are tracked in the activity log, so you can see which ones were approved, rejected, or completed instantly.
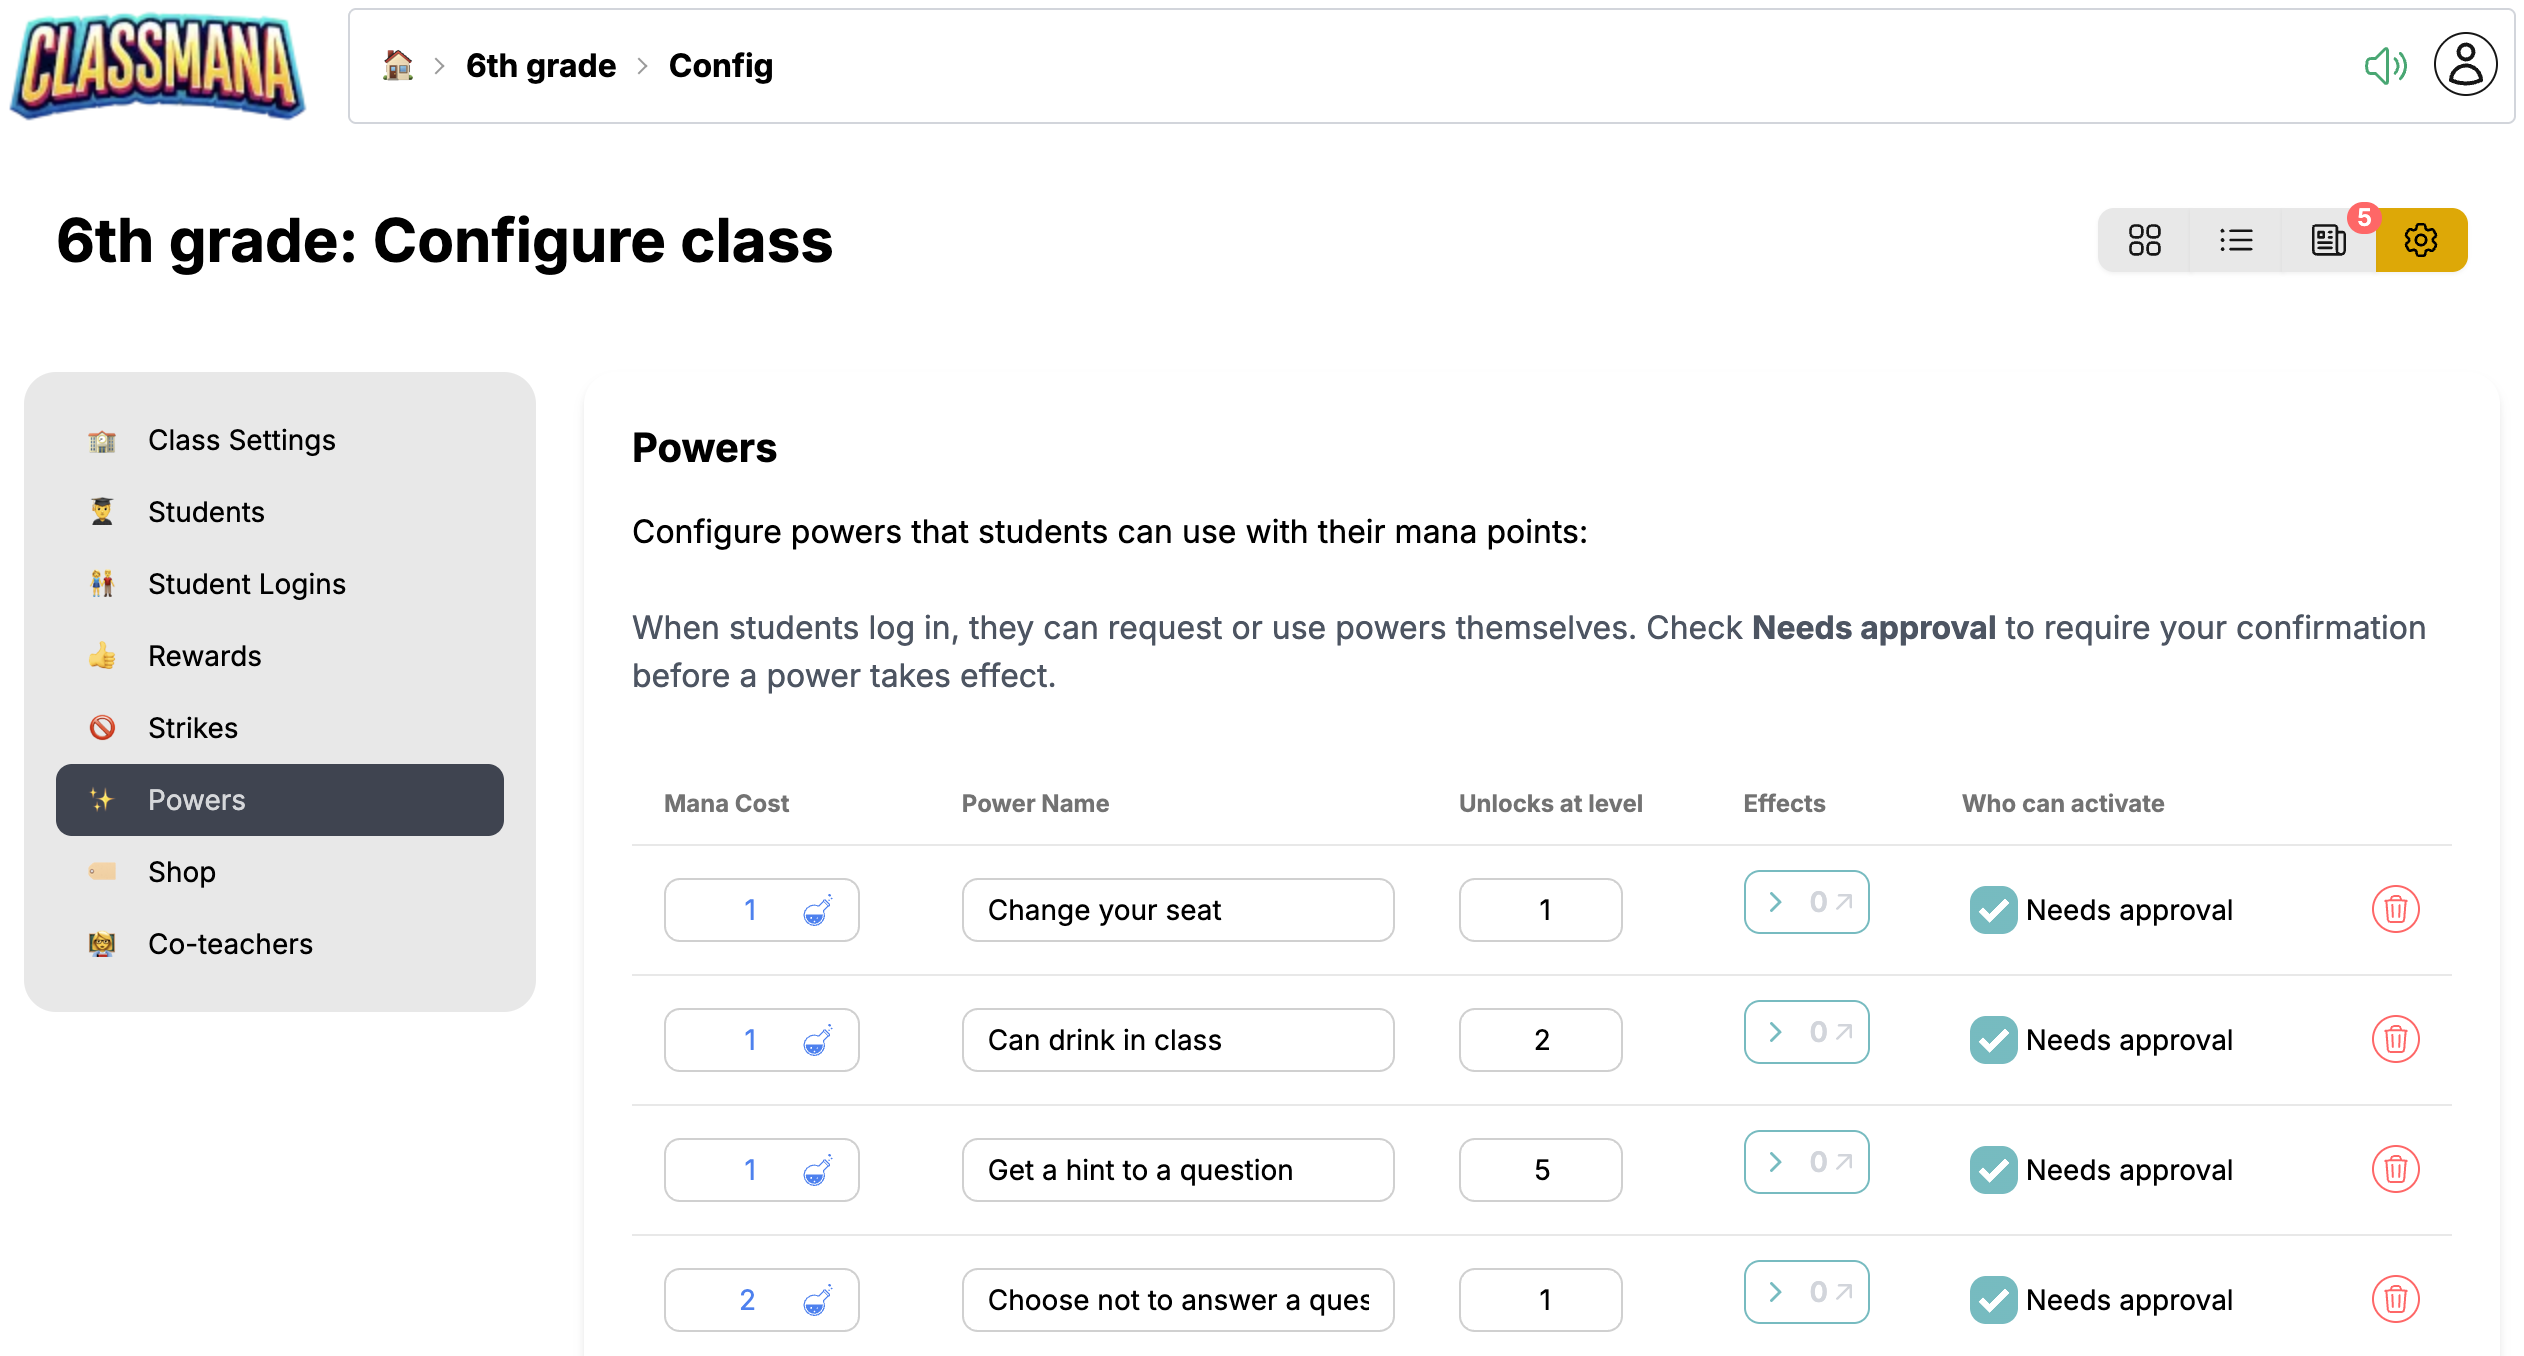
Configure Approval Requirements
You have complete control over which powers and shop items require your approval. Configure each one individually based on your classroom management style.
In Class Settings → Powers, you'll find a "Needs approval" checkbox for each power. Similarly, in Class Settings → Shop, each shop item has the same option.
- ✅ Checked - Students must request approval; you review and approve/reject
- 🔲 Unchecked - Students can use the power or buy the item instantly
Mixed Approach
You can set approval requirements per-power and per-item. For example, "Listen to music" could be instant, while "Homework pass" requires your approval.
Next Steps
Once Stage 2 is running smoothly, consider expanding:
- Stage 3: Health System - Add consequences for misbehavior with health points
- Stage 4: Gold & Shop - Create a classroom economy with gold currency
For more tips on keeping students engaged:
- Best Practices - Strategies for long-term engagement throughout the year