Quests
Quests let you turn assignments and learning activities into narrative-driven adventures. You create visual maps where each node is an objective — a task, quiz, info node, or boss challenge. Students progress through the map by completing objectives, unlocking new paths, and earning rewards along the way.
Quests are available as soon as you have a class with students.
Prerequisites:
- Registered account
- Class created with students added
Quick Start Guide
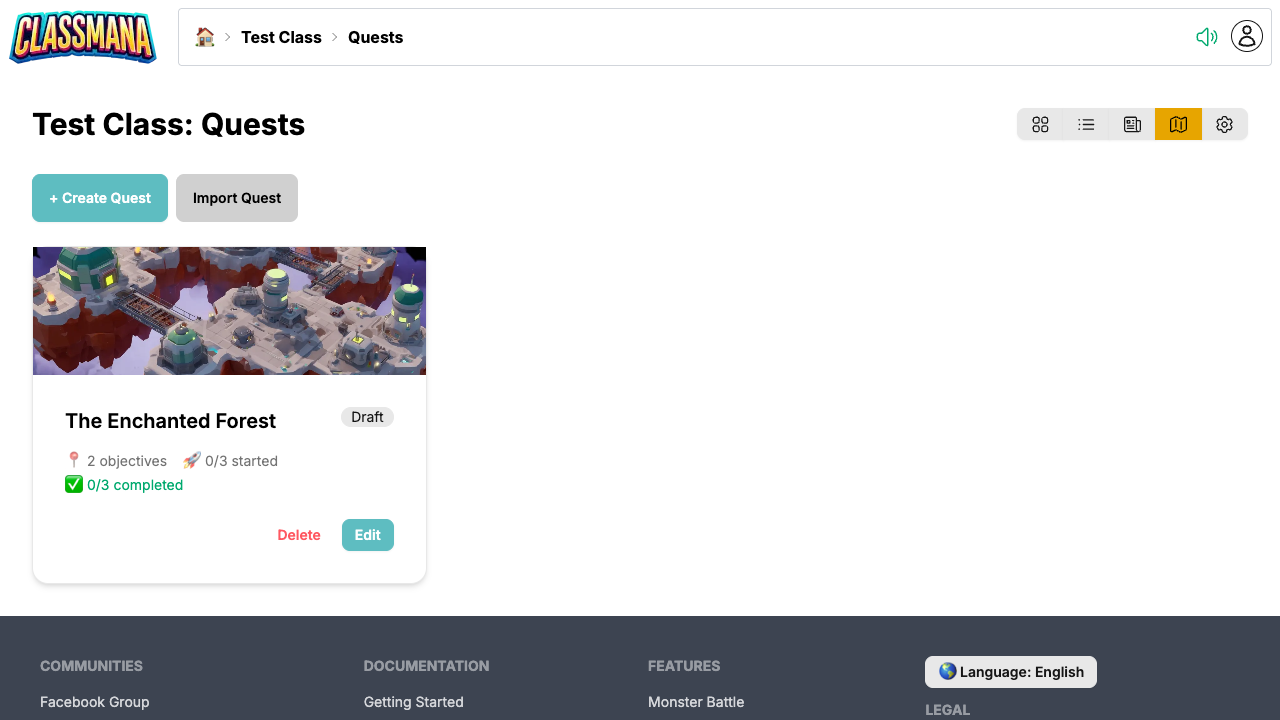
1. Create a Quest
- From the class dashboard, click "Quests" in the toolbar
- Click "Create Quest"
- Enter a name for your quest
- You'll be taken to the quest map editor
2. Choose a Map Background
The map editor opens with a random canvas. Pick a background theme to set the mood for your quest:
- Click the Map Background in the editor toolbar
- Browse through 20+ themed categories — from Pirate and Wizard School to Sci-Fi and Wild West
- Click a map to select it
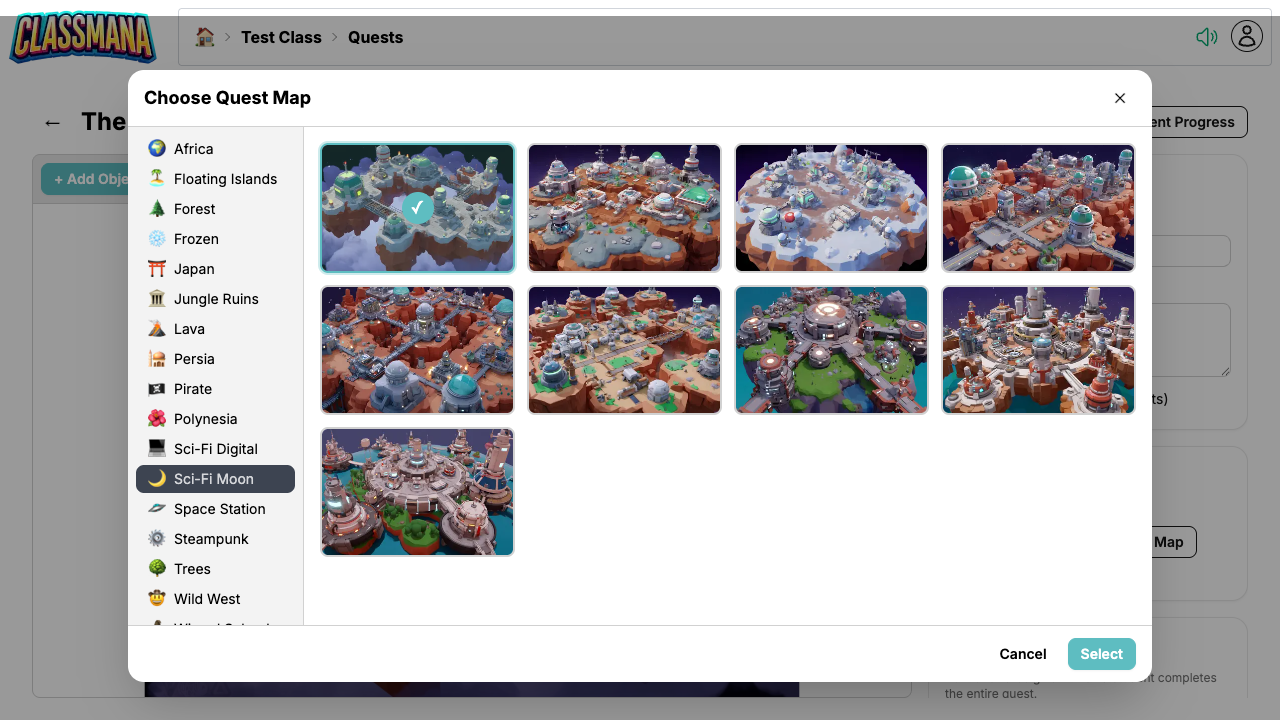
Map Categories
There are over 200 unique map backgrounds organized by theme: Africa, Floating Islands, Forest, Frozen, Japan, Jungle Ruins, Lava, Persia, Pirate, Polynesia, Sci-Fi, Space Station, Steampunk, Wild West, Wizard School, Wonderland, and more. Pick one that fits the narrative of your lesson or unit.
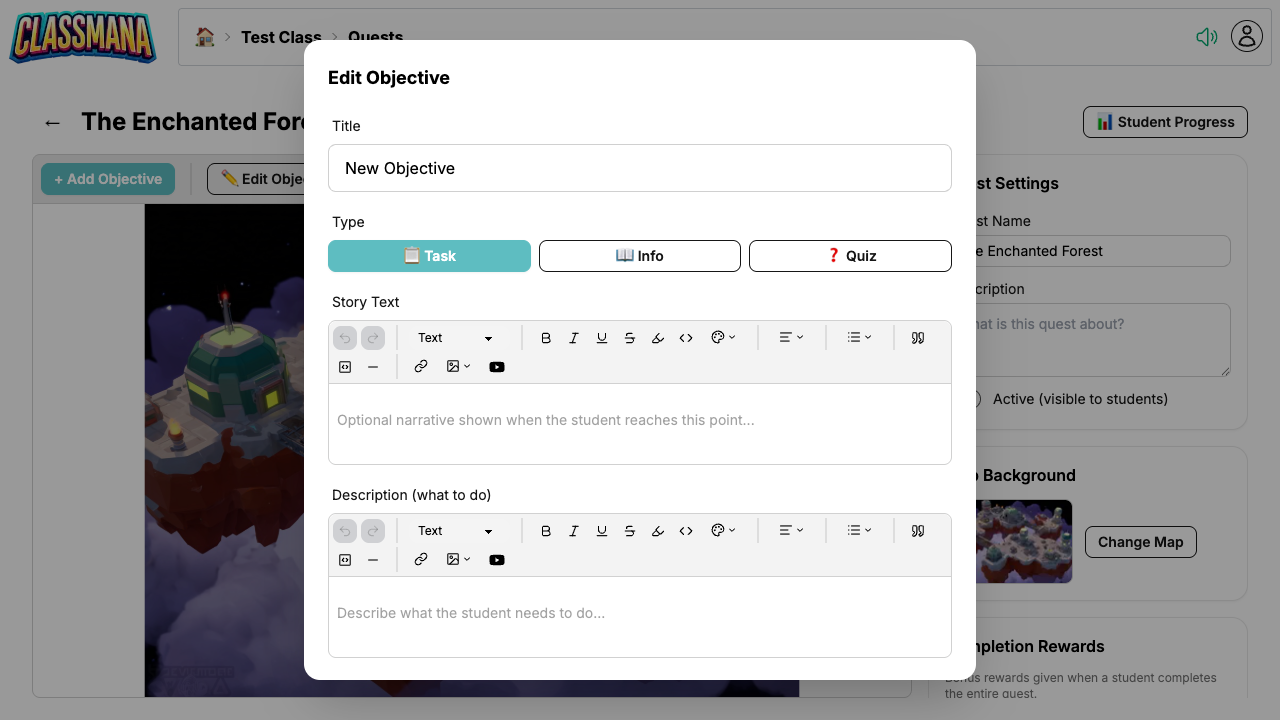
3. Add Objectives
Click + Add Objective to add an objective to the map. Each objective is a node that students will interact with:
- Task — A regular assignment. Students either self-report completion or submit it for your approval.
- Info — A narrative-only node for story context, instructions, or background information. Automatically completed when the student reads it.
- Quiz — An auto-graded objective with questions.
For each objective, configure:
- Title — What students see on the map
- Type — Task, Info, or Quiz
- Story Text — Narrative text shown when the student reaches this objective, to set the scene or advance the story
- Description — Detailed instructions for what students need to do
- Rewards — Experience, gold, mana, or health awarded on completion
Both Story Text and Description use a rich text editor that supports formatting, images, links, and embedded YouTube videos.
4. Connect Objectives with Paths
New objectives are automatically connected to the current end nodes of the map, so you can build a linear quest simply by adding objectives one after another.
To manually connect two objectives:
- Click the starting objective to select it
- Click the "Connect" button
- Click the destination objective
The path appears as a directed arrow on the map. Students can only access an objective once all its prerequisites (incoming paths) are completed. This lets you create:
- Linear sequences — One objective after another
- Branching paths — Students choose which path to take
- Convergence points — Multiple paths leading to a single objective
Flexible Progression
Branching paths give students autonomy — they can choose their own learning path. Use convergence points to bring everyone back together before a final boss or assessment.
5. Activate the Quest
Quests start as not active and are not visible to students.
When you're ready:
- Toggle the quest status of Active to enabled
- Students will see the quest in their quest list and can start working on it
You can switch a quest back to not active at any time to hide it from students.
Quest Map Editor
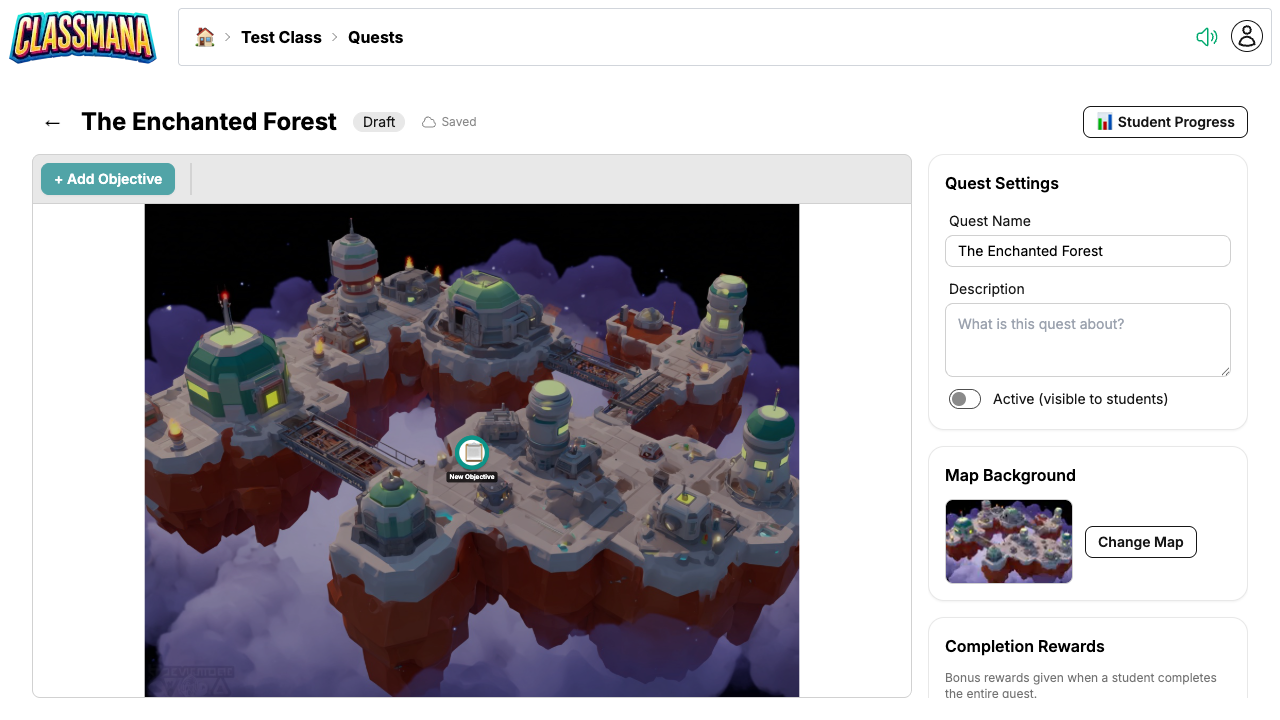
Editor controls:
- Click an objective to select it and open its settings in a dialog
- Drag objectives to reposition them on the map
- Delete to remove selected objectives or paths
Quest-level settings available in the sidebar.
- Quest name and description
- Description shown to students in the quest list
- Map background — change the theme anytime
- Active status
- Completion Rewards — extra rewards when a student completes all objectives
Auto-Save
The editor auto-saves your changes continuously. You don't need to manually save — just close the editor when you're done.
Copying Quests
Once you've designed a quest you like, you can reuse it without rebuilding it from scratch. ClassMana gives you two ways to copy a quest, depending on where you're starting from:
- Copy — push the current quest out to one or more of your classes
- Import — pull a quest in from any of your other classes into the current one
Both options produce a full duplicate of the original quest, including the map background, all objectives, their story text, descriptions, rewards, and the connections between them. Copies are always created as not active, so you can review and tweak them before making them visible to students. Each copy is independent — student progress and any later edits stay scoped to the class it lives in.
Copying to Other Classes
Use Copy when you're looking at the quest you want to reuse and want to send it to other classes (or duplicate it in the current one):
- From the quest list, find the quest you want to copy
- Click the Copy button on the quest card
- In the dialog, select one or more target classes — including the current class if you want a duplicate alongside the original
- Click Copy to confirm
When you copy a quest into the same class, " (copy)" is appended to the new quest's name to keep them distinguishable. When copying to other classes, the original name is kept.
Importing from Another Class
Use Import when you're in the class that should receive the quest and want to pick one from any of your other classes:
- Open the quest list of the class where you want the new quest to appear
- Click the Import Quest button at the top of the quest list
- Browse the quests grouped by class and select the one you want to import
- Click Import to confirm
You'll be taken straight into the new quest's editor so you can adjust it for the new class. Importing from the current class is also allowed, in which case " (copy)" is added to the name.
Copy vs. Import
Use Copy when you want to share a quest with several classes in one go. Use Import when you're setting up a single class and want to pull in a quest you've already built somewhere else.
Reuse Across Classes
If you teach the same subject to multiple groups, build the quest once and copy or import it into each class. Each copy is independent — student progress and any later edits stay scoped to that class.
Student Experience
When students log in, they access quests from their student dashboard.
Navigating Quests
- Students click the Quests button in their HUD
- They see a list of all active quests with their progress
- Clicking a quest opens the full-screen map
Objective Status
On the map, objectives are color-coded by status:
- Locked (gray) — Prerequisites not yet completed
- Available (blue) — Ready to interact with
- Pending (orange) — Submitted, awaiting teacher approval
- Completed (green) — Done
Students can only interact with available objectives. Completing an objective automatically unlocks the next ones in the path.
Completing Objectives
- Task (auto-complete): Click the objective → read the details → click "Mark as Complete"
- Task (needs approval): Click the objective → read the details → click "Submit for Approval" → wait for teacher to approve
- Info: Click the objective → read the content → automatically completed
- Quiz: Click the objective → answer all questions → submit → see results immediately
Student Rewards
When a student completes an objective, any configured rewards (Experience, Gold, Mana, Health) are applied to their account immediately. If the quest has bonus completion rewards, those are awarded when the student finishes all objectives.
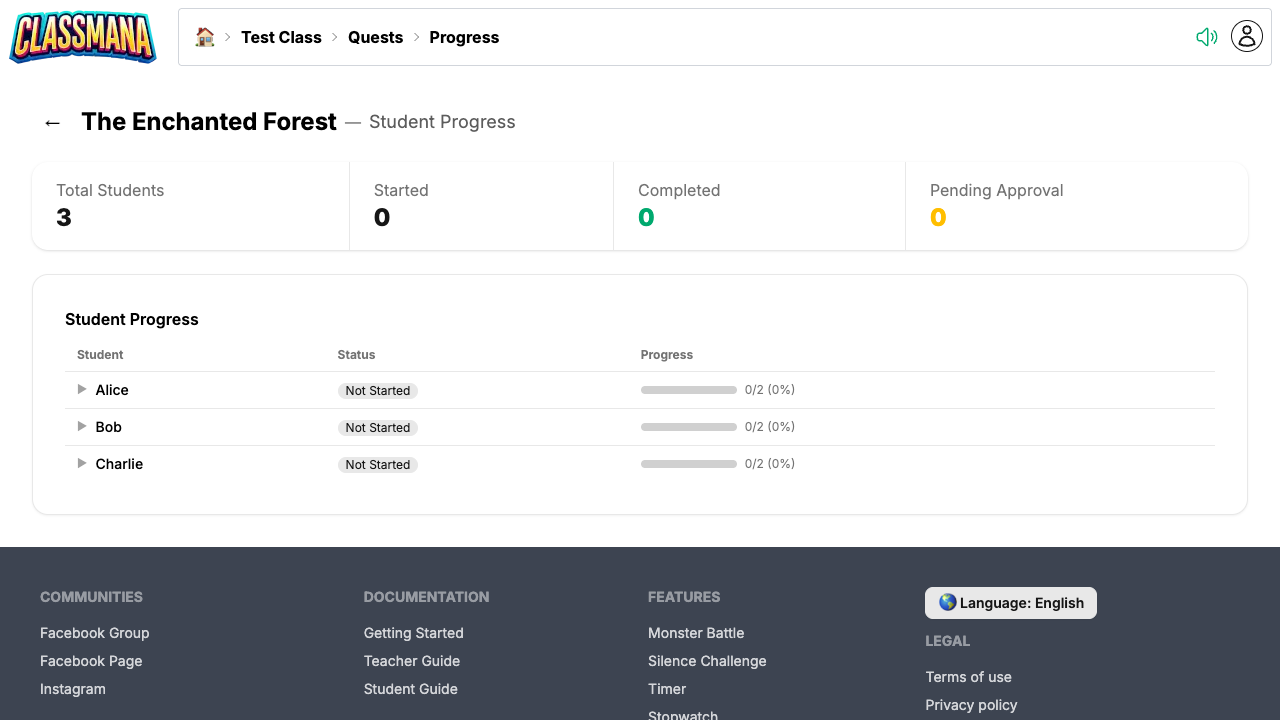
Tracking Student Progress
Progress Page
Monitor your students' quest progress from the dedicated progress page:
- From the quest list, click a quest
- Click "Progress" in the toolbar
- You'll see a list of all students with their status for each objective
Approving Submissions
When students submit objectives for approval:
- You'll see a pending approval counter on the quest list page
- Open the progress page to see all pending submissions
- Approve or reject each submission individually
- Use bulk approve to approve all pending submissions at once
Manual Progress Management
You can also manage student progress directly from the progress page. Click a student's row to expand it and see every objective in the quest along with that student's status:
- Mark as Complete — For any objective that is unlocked (available) for the student, click Complete to manually mark it as completed on their behalf. Configured rewards are awarded immediately, and any objectives that depend on it become unlocked. Use this when a student has done the work offline (for example, on paper or in class) and you want to credit them without making them resubmit through ClassMana.
- Reset a student's quest progress to start over
When to Manually Complete
Manually completing objectives is useful for students who were absent during a digital activity, completed work in a different format, or are stuck on a step you've already verified in person. It saves them from having to redo work just to keep their quest progress in sync.
Pending Approvals
Check the quest list regularly for pending approvals. The counter badge makes it easy to see at a glance if students are waiting for your review.
Best Practices
Designing Effective Quests
- Start with a clear learning goal — What should students know or be able to do by the end of the quest?
- Keep it manageable — 5-10 objectives per quest is a good starting point. Too many can feel overwhelming.
- Mix objective types — Alternate between tasks, info nodes, and quizzes to keep things varied
- Use branching for differentiation — Create easier and harder paths so students can choose their challenge level
- Add narrative context — Use info nodes and descriptions to tell a story. Even a simple framing ("You're exploring a mysterious forest...") adds engagement.
Reward Strategy
- Prefer Gold over Experience — Keep Experience for rewarding good behavior and use Gold as the main quest reward. This separates behavioral rewards from scholastic achievements.
- Small rewards per objective — Give modest Gold for each objective to provide steady feedback
- Bigger bonus for completion — Use the quest completion bonus to reward students who finish the whole quest
- Match effort to reward — Boss objectives and quizzes should give more than simple info nodes
Managing Quests Over Time
- Create quests for each unit — Map quests to your curriculum units or chapters
- Use Draft status — Prepare quests in advance, then activate them when you're ready
- Review progress weekly — Check the progress page to identify students who are stuck or falling behind
- Deactivate completed quests — Switch finished quests back to Draft to keep the student quest list clean
Next Steps
Combine quests with other ClassMana features for maximum engagement:
- Stage 1: Rewards & Powers — Use quest rewards to feed into the Experience and leveling system
- Stage 4: Gold & Shop — Award Gold in quests that students can spend in the class shop
- Stage 5: Teams — Assign team-based quests where students collaborate
- Best Practices — General tips for keeping students engaged throughout the year